Watercolor painting is one of the most accessible and expressive art forms, offering luminous colors, fluid textures, and endless creative possibilities. Beginners and hobby artists often find watercolor both challenging and rewarding because it requires balancing control with spontaneity. This article explores nine essential techniques, each explained in detail with practical tips, lists of methods, and unique insights to help you grow as a watercolor painter.
Understanding Watercolor Basics
Watercolor painting begins with understanding the medium itself: pigments suspended in water that create translucent layers on paper. Unlike opaque paints, watercolor relies on the whiteness of the paper to shine through, giving it a distinctive glow. Beginners should focus on learning how water, pigment, and paper interact, as this foundation will influence every technique they practice.
- Pigment transparency – Watercolors allow light to pass through, creating luminous effects.
- Paper quality – Cold-pressed paper is versatile, while hot-pressed offers smoother surfaces.
- Brush types – Round brushes are ideal for detail, flat brushes for washes.
- Water control – The balance between pigment and water determines intensity.
- Layering – Building colors gradually prevents muddiness.
By mastering these basics, hobby artists can avoid frustration and begin experimenting with confidence. Understanding how water flows, how pigment settles, and how paper absorbs paint sets the stage for more advanced techniques.
Wet-on-Wet Technique
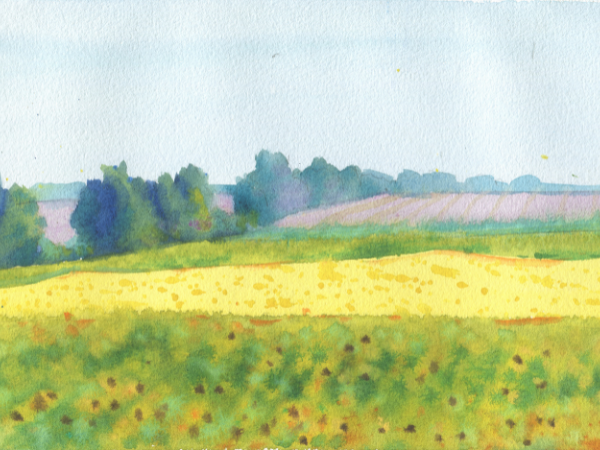
The wet-on-wet technique is one of the most magical aspects of watercolor painting. It involves applying paint onto a wet surface, allowing colors to blend and flow naturally. This creates soft edges, dreamy transitions, and atmospheric effects perfect for skies, backgrounds, and abstract art.
- Soft blending – Colors merge seamlessly without harsh lines.
- Atmospheric skies – Ideal for sunsets, clouds, and misty landscapes.
- Abstract effects – Random flows create unique textures.
- Controlled chaos – Tilt the paper to guide pigment movement.
- Layer depth – Multiple washes add richness.
This technique encourages artists to embrace unpredictability. Beginners often fear losing control, but wet-on-wet teaches them to trust the medium and discover unexpected beauty in fluidity.
Wet-on-Dry Technique
Wet-on-dry is the opposite of wet-on-wet: paint is applied to dry paper, producing crisp edges and defined shapes. This technique is essential for details, sharp outlines, and controlled compositions.
- Sharp edges – Perfect for architectural lines or botanical details.
- Layer precision – Each stroke remains distinct.
- Texture control – Brush marks are more visible.
- Color intensity – Pigments appear bolder.
- Mixed techniques – Combining both methods adds variety.
Wet-on-dry gives beginners confidence in creating structured paintings. It is especially useful for subjects requiring clarity, such as portraits, still life, or detailed landscapes.
Layering and Glazing
Layering, also known as glazing, involves applying transparent washes over dried layers to build depth and richness. This technique allows artists to create subtle color shifts and realistic shading.
- Transparency – Each layer interacts with the one beneath.
- Color mixing – Overlapping hues create new tones.
- Depth creation – Shadows and highlights emerge gradually.
- Patience – Waiting for layers to dry is crucial.
- Complex effects – Glazing adds sophistication to simple subjects.
Glazing teaches beginners discipline and patience. It transforms flat paintings into dynamic works with dimension and subtlety.
Dry Brush Technique
Dry brush involves using minimal water with pigment, producing textured strokes that mimic rough surfaces. It’s excellent for details like fur, grass, or wood grain.
- Texture creation – Adds tactile quality to paintings.
- Controlled strokes – Each mark is deliberate.
- Surface variation – Works well on rough paper.
- Highlight effects – Creates shimmering accents.
- Detail emphasis – Enhances realism in small areas.
This technique is ideal for hobby artists who want to add character and realism to their work. It contrasts beautifully with smooth washes.
Lifting and Erasing
Lifting refers to removing pigment from the paper using a damp brush, sponge, or tissue. It’s a corrective and creative technique that allows artists to lighten areas or create highlights.
- Highlight creation – Perfect for reflective surfaces.
- Error correction – Helps fix mistakes.
- Texture effects – Adds variety to surfaces.
- Soft transitions – Smoothens harsh edges.
- Selective erasing – Removes pigment strategically.
Beginners appreciate lifting because it provides flexibility. It reduces fear of mistakes and encourages experimentation.
Splattering and Sprinkling
Splattering involves flicking paint onto the paper for dynamic, spontaneous effects. Sprinkling salt or alcohol creates unique textures by disrupting pigment flow.
- Dynamic energy – Adds movement and excitement.
- Texture play – Salt crystals absorb pigment.
- Abstract accents – Random marks enhance creativity.
- Controlled chaos – Masking areas keeps composition balanced.
- Mixed media – Works well with ink or gouache.
This technique is fun and liberating. It encourages hobby artists to break free from rigid control and embrace spontaneity.
Masking and Resist Techniques
Masking fluid or wax can be applied to preserve white areas of the paper. Once removed, these areas remain untouched, creating sharp highlights and contrast.
- Preserve highlights – Keeps paper white for light effects.
- Sharp contrasts – Enhances dramatic compositions.
- Creative resist – Wax or tape can block pigment.
- Layer control – Allows complex layering.
- Experimental effects – Encourages innovation.
Masking is especially useful for beginners who struggle with preserving highlights. It ensures clarity and adds professional polish.
Combining Techniques for Creative Expression
Watercolor painting truly comes alive when artists begin blending multiple techniques into a single composition. Instead of relying on one method, combining approaches like wet‑on‑wet, dry brush, and glazing allows hobbyists to create layered, dynamic works that feel both spontaneous and intentional. This fusion of methods is what transforms a simple painting into a personal statement, showcasing the artist’s unique vision and style.
- Technique fusion – Pairing wet‑on‑wet backgrounds with crisp wet‑on‑dry details creates balance.
- Personal style – Experimenting with combinations helps artists discover their signature look.
- Balanced composition – Using contrasting techniques ensures harmony between soft and sharp elements.
- Creative freedom – Mixing methods encourages exploration beyond traditional rules.
- Skill growth – Each experiment builds confidence and technical mastery.
For example, an artist might begin with a wet‑on‑wet wash to establish a dreamy sky, then add wet‑on‑dry strokes for tree branches, followed by dry brush textures for grass, and finish with glazing to deepen shadows.