Drawing in three dimensions isn’t just about realism — it’s about creating the illusion of space, form, and volume on a flat surface. Whether you’re sketching a still life or designing a character, mastering depth transforms your work from static to dynamic. This guide walks you through the essential techniques to bring your drawings to life.
Understanding Depth in Art
Depth refers to the visual perception of space and distance in a two-dimensional artwork. It helps viewers feel immersed and gives your drawings a sense of realism or atmosphere.
- Linear perspective – Creates the illusion of distance using vanishing points
- Overlapping – Places objects in front of others to suggest spatial order
- Size variation – Smaller objects appear farther away
- Atmospheric perspective – Uses color and contrast to simulate depth
- Foreshortening – Distorts proportions to show objects receding in space
Mastering depth allows you to guide the viewer’s eye and build believable compositions.
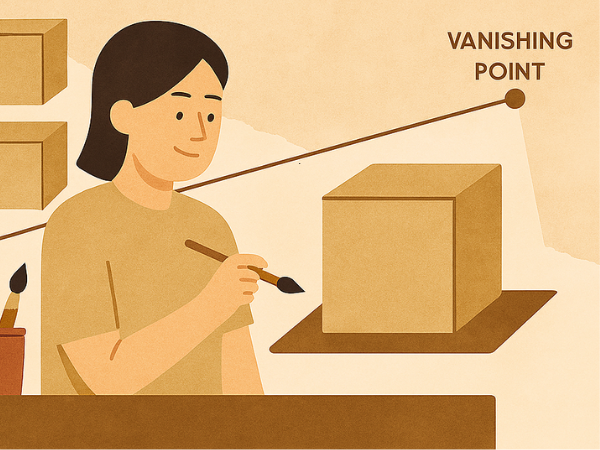
Mastering Linear Perspective
Linear perspective is a mathematical system that helps artists draw objects as they appear to the eye. It’s foundational for architectural and spatial accuracy.
- One-point perspective – Uses a single vanishing point on the horizon
- Two-point perspective – Adds a second vanishing point for angled objects
- Three-point perspective – Introduces vertical depth for dramatic views
- Horizon line – Represents the viewer’s eye level
- Vanishing points – Where parallel lines converge in the distance
Practicing perspective grids helps you build environments and scenes with realistic proportions.
Using Overlapping to Show Space
Overlapping is one of the simplest ways to suggest depth. When one object covers part of another, it naturally appears closer to the viewer.
- Foreground elements – Placed in front of others
- Midground – Positioned between foreground and background
- Background – Farthest from the viewer
- Layering – Adds complexity and realism
- Negative space – Helps define object boundaries
Strategic overlapping creates a sense of order and helps separate visual planes.
Playing with Size and Scale
Size variation is a powerful tool for depth. Objects drawn smaller appear farther away, while larger ones feel closer.
- Diminishing size – Gradually reduce object size with distance
- Proportional scaling – Keep relative sizes consistent
- Exaggeration – Use scale creatively for stylized depth
- Foreground emphasis – Make key elements larger
- Background compression – Shrink distant details
Balancing scale helps maintain realism and directs viewer attention.
Applying Atmospheric Perspective
Atmospheric perspective mimics how the atmosphere affects visibility. It’s especially useful in landscapes and large scenes.
- Color fading – Distant objects appear lighter or bluer
- Contrast reduction – Less contrast with distance
- Detail loss – Far objects have fewer visible features
- Soft edges – Blur distant contours
- Value shifts – Use lighter values for background elements
This technique adds mood and realism, especially in outdoor or expansive compositions.
Shading and Light Direction
Shading gives form to flat shapes. Understanding how light interacts with surfaces is key to creating volume and depth.
- Light source – Determines shadow direction and intensity
- Core shadow – Darkest part of the object
- Cast shadow – Shadow projected onto another surface
- Highlight – Brightest spot where light hits
- Midtones – Transition between light and dark
Consistent shading transforms flat drawings into dimensional forms.
Using Texture to Enhance Depth
Texture adds tactile realism and can suggest spatial relationships. Varying texture intensity helps distinguish foreground from background.
- Cross-hatching – Creates tonal variation
- Stippling – Adds fine detail and depth
- Scribbling – Suggests organic surfaces
- Smooth gradients – Ideal for soft transitions
- Pattern density – Denser textures appear closer
Texture can be both visual and symbolic, enhancing the viewer’s perception of space.
Foreshortening for Dynamic Angles
Foreshortening is the distortion of objects to show depth when they extend toward or away from the viewer. It’s essential for figure drawing and action scenes.
- Compressing limbs – Shorten parts that point toward the viewer
- Perspective distortion – Adjust proportions based on angle
- Overlapping forms – Reinforce spatial layering
- Reference photos – Study real-life examples
- Gesture drawing – Practice dynamic poses quickly
Foreshortening adds drama and realism to your compositions.
Composition and Depth Cues
Good composition uses depth cues to guide the viewer’s eye and create visual flow. It balances elements across the page while maintaining spatial clarity.
- Rule of thirds – Divide the canvas into thirds for balance
- Leading lines – Direct the viewer’s gaze
- Framing – Use foreground elements to frame the scene
- Visual hierarchy – Prioritize focal points
- Depth layering – Combine multiple techniques
Thoughtful composition makes your drawing feel intentional and immersive.
Practice Exercises for Building Depth
Regular practice helps internalize depth techniques. These exercises build muscle memory and visual intuition.
- Draw cubes in one-, two-, and three-point perspective
- Sketch overlapping objects from life
- Create a landscape using atmospheric perspective
- Shade basic forms with a single light source
- Foreshorten limbs in figure drawing studies
Consistent practice sharpens your spatial awareness and improves your overall drawing skill.