Too thin, and the colors might bleed or fade. You want your lines sharp and your colors vibrant every single time. This guide is made just for you—to help you master the art of ink consistency. By the end, you’ll know exactly how to adjust your ink for flawless results, no matter your style or tools.
Ink Consistency Basics
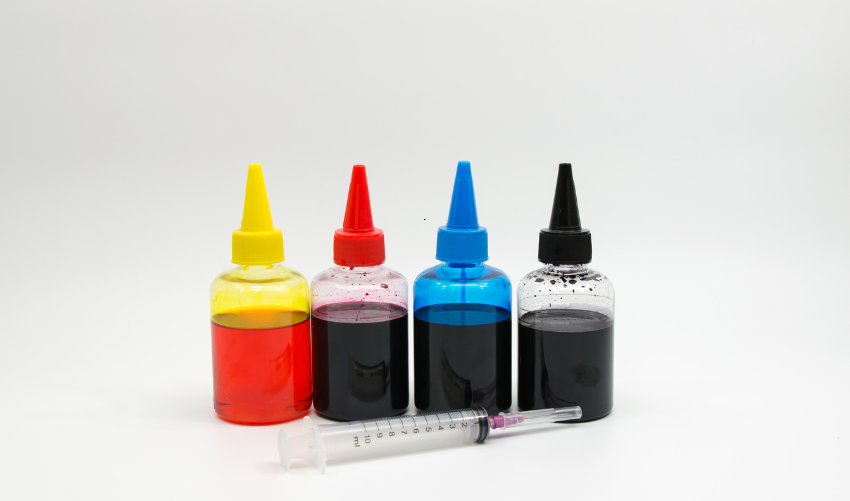
Ink Consistency Basics form the foundation of any successful art project involving ink. The right ink texture helps artists control flow, color depth, and detail in their work. Ink that is too thick or too thin can cause blotches, uneven lines, or fading.
Types Of Ink
Artists use different types of ink for various effects and techniques. Each ink type has a unique composition and behaves differently when applied.
- India Ink: Dense and black, perfect for strong lines and shading.
- Water-based Ink: Easy to dilute and clean, ideal for washes and lighter shades.
- Alcohol Ink: Fast-drying, vibrant, and used mainly on non-porous surfaces.
- Gel Ink: Smooth flow and rich color, common in pens and fine details.
Knowing these types helps in choosing the right ink for your project and adjusting its consistency properly.
Why Consistency Matters
Ink consistency affects every part of the artwork process. The right balance helps control how ink flows from the brush or pen to the paper. Ink that is too thick may clog tools or create uneven patches. Thin ink can spread too much and lose sharpness. Good consistency leads to clean lines and vibrant colors.
Consistency also impacts drying time and durability:
- Thicker ink dries slower but resists smudging once set.
- Thinner ink dries quickly but can fade or bleed.
Artists often adjust ink by adding water or special mediums. Testing on scrap paper helps find the ideal texture. Consistent ink also prevents wear on tools and reduces frustration during work.

Tools For Measuring Ink
Measuring ink consistency helps artists maintain quality and get predictable results. Various tools exist to check the ink’s thickness and flow. These tools range from high-tech devices to simple, homemade methods. Each has its benefits and suits different needs and budgets.
Viscosity Meters
Viscosity meters, also known as viscometers, are precise tools designed to measure how thick or thin ink is. They measure the resistance of the ink to flow. This resistance is called viscosity. Using a viscosity meter gives a clear number that shows the ink’s consistency.
There are several types of viscosity meters commonly used by artists and printers:
- Rotational Viscometers: They spin a spindle in the ink and measure the resistance.
- Capillary Viscometers: They measure the time it takes for ink to flow through a narrow tube.
- Falling Ball Viscometers: They time how fast a ball falls through the ink.
Using these meters helps artists keep their ink consistent across different batches. Consistency is key for professional results. Below is a simple comparison:
| Type | How It Works | Best For | Price Range |
|---|---|---|---|
| Rotational | Measures resistance to spindle rotation | All types of inks | $$$ |
| Capillary | Measures flow time through a tube | Thin inks | $$ |
| Falling Ball | Times ball falling speed | Medium to thick inks | $ |
Viscosity meters provide accurate and repeatable measurements. They are perfect for artists who want exact control over ink behavior. These tools also save time by reducing guesswork.
Simple Diy Methods
Not every artist has access to professional tools. Many use simple DIY methods to check ink consistency. These methods use common items and give quick, practical results. They rely on observation and simple tests.
Here are some easy ways to measure ink at home or in a small studio:
- Drop Test: Drop a small amount of ink on a flat surface. Watch how fast it spreads or absorbs.
- Brush Stroke Test: Use a brush to apply ink on paper. Check if the stroke is smooth or uneven.
- Flow Test: Tilt a surface with ink. See how fast the ink flows down.
- Viscosity Cup: Use a small cup with a hole at the bottom. Fill with ink and time how long it takes to empty.
These methods are simple yet effective. They help artists adjust ink by adding water or thickener. Here is a quick guide for DIY ink checks:
| Test | What to Look For | Adjustment Tip |
|---|---|---|
| Drop Test | Spreading too fast means thin ink | Add a thickener or reduce water |
| Brush Stroke | Uneven stroke means too thick or clumpy | Add water little by little |
| Flow Test | Flows too quickly means thin | Add thickener or pigment |
| Viscosity Cup | Fast emptying means low viscosity | Slow down by adding thickener |
Simple DIY methods are great for beginners and artists on a budget. They encourage learning by doing. These tests allow artists to feel the ink’s behavior directly. Changes are easy to make right away.
Adjusting Ink Thickness
Adjusting ink thickness is a key step in achieving the perfect flow and finish for your art projects. The right consistency ensures smooth application, vibrant colors, and prevents smudging or clogging. Ink that is too thick can lead to uneven lines, while ink that is too thin may bleed or fade quickly.
Adding Thinners
Thinners reduce the viscosity of ink, making it runnier and easier to spread. Artists often add thinners to achieve smoother lines or to prepare ink for fine detail work. Common thinners include water for water-based inks and specialized solvents for oil-based inks.
Key points for adding thinners:
- Use small amounts to avoid over-thinning the ink.
- Mix thoroughly for an even consistency.
- Test the ink on scrap material before applying to your artwork.
- Keep in mind the drying time may change after adding thinners.
The table below shows common thinners and their best uses:
| Thinner Type | Ink Type | Effect on Ink | Usage Tips |
|---|---|---|---|
| Water | Water-based inks | Lightens and thins ink | Add slowly and mix well |
| Mineral spirits | Oil-based inks | Reduces thickness and improves flow | Use in a ventilated area |
| Alcohol | Alcohol-based inks | Thins ink and speeds drying | Handle with care, flammable |
Adding thinners demands patience. Add a little, stir, then test. Repeat until desired flow is reached. This practice prevents ruining the ink or your artwork.
Using Additives
Additives alter ink properties beyond just thickness. They can improve drying time, increase durability, or enhance texture. Some additives help control ink behavior on different surfaces.
Popular additives include:
- Flow improvers: Make ink spread evenly and reduce streaks.
- Matte agents: Change the finish from glossy to flat.
- Retarders: Slow down drying for blending.
- Binders: Increase adhesion and prevent cracking.
Consider the purpose of your artwork when selecting additives. Using the wrong additive can affect color vibrancy or drying time negatively.
Here is a comparison of common additives and their effects:
| Additive | Primary Effect | Ideal Use | Application Tips |
|---|---|---|---|
| Flow Improver | Enhances ink flow | Detail work, smooth lines | Use sparingly, mix well |
| Matte Agent | Changes gloss to matte | Flat finish artworks | Test on sample first |
| Retarder | Extends drying time | Blending and layering | Apply in thin layers |
| Binder | Improves adhesion and durability | Outdoor or mixed media art | Use according to manufacturer |
Mix additives carefully into the ink. Stir slowly to avoid bubbles. Always test the ink’s response before applying to the main work.
Common Ink Issues
Achieving the right ink consistency is essential for artists who want smooth, vibrant results. Many struggle with common ink issues that affect their work’s quality. Problems like ink being too thick, too thin, or showing clumps and separation can ruin a project.
Too Thick
Ink that is too thick causes several problems. It moves slowly, making lines uneven and blotchy. Thick ink can clog pens, brushes, or printers, leading to frustration and wasted materials. This issue often appears when ink dries out or has too much pigment concentration.
Signs of thick ink include:
- Uneven strokes and rough edges
- Slow flow from the tool
- Clogging or blockage during application
- Excessive drying time on paper
Fixing thick ink involves thinning it carefully. Use a compatible thinner or water, depending on the ink type. Add the thinner in small amounts, stirring well to avoid over-thinning. Test the ink on scrap paper to check flow and consistency. Here is a simple guide:
| Step | Action | Tip |
|---|---|---|
| 1 | Add a few drops of thinner | Use a dropper for control |
| 2 | Stir gently but thoroughly | Avoid shaking, which creates bubbles |
| 3 | Test the ink flow | Apply on scrap paper |
| 4 | Repeat if still too thick | Add thinner slowly |
Too Thin
Ink that is too thin flows too quickly and lacks color strength. Thin ink can cause bleeding, fading, and weak lines in artwork. It often results from adding too much thinner or using old, diluted ink. Thin ink also dries fast but may not stay vibrant.
Common problems with thin ink include:
- Weak or light-colored lines
- Ink spreading beyond the intended area
- Uneven color patches
- Paper warping due to excess liquid
To fix thin ink, add pigment or a thickening agent designed for your ink type. Avoid adding too much at once. Mix well and test on scrap material. Follow this simple process:
- Slowly add pigment or thickener
- Stir thoroughly for even distribution
- Check the ink on test paper
- Adjust again if needed
Remember, maintaining the right balance keeps your ink vibrant and easy to work with.
Clumping And Separation
Clumping and separation occur when ink particles group together or separate from the liquid. This issue causes uneven color and texture. Clumps can clog tools, while separation leads to inconsistent application. It happens due to poor storage, expired ink, or improper mixing.
Signs include:
- Visible lumps or chunks in the ink
- Layering of liquid and solids
- Uneven or patchy color on the artwork
- Difficulty in applying ink smoothly
To fix clumping and separation:
- Shake or stir the ink well before use
- Use a fine mesh strainer to remove lumps
- Store ink in cool, dark places to prevent spoilage
- Replace old ink if separation cannot be fixed
Proper care and handling keep ink fresh and consistent. Regularly checking ink quality prevents clumping and separation during your creative process.
Techniques For Smooth Application
Techniques for smooth application play a vital role in achieving the right ink consistency. Smooth ink flow ensures clean lines and vibrant colors. Artists must focus on preparing and handling ink properly. This section explores key methods for mixing ink and maintaining its consistency during use.
Proper Mixing
Proper mixing is the first step to get smooth ink consistency. Poor mixing leads to clumps or separation, causing uneven application. Follow these steps for effective mixing:
- Use clean tools: Always mix with a clean stick or brush to avoid contamination.
- Stir gently: Avoid shaking vigorously; slow stirring blends pigments well.
- Check texture: The ink should feel smooth, not grainy or watery.
- Adjust with additives: Add small amounts of water or medium to reach desired flow.
Mixing time depends on the ink type and pigments used. For thicker inks, stir longer until uniform. Thin inks require less stirring but watch for separation.
| Ink Type | Mixing Time | Signs of Proper Mix |
|---|---|---|
| Water-based | 1-2 minutes | Smooth flow, no lumps |
| Oil-based | 3-5 minutes | Even color, no separation |
| Gel | 2-3 minutes | Consistent texture, no clumps |
Test your ink on scrap paper before starting. This confirms the consistency suits your technique. Proper mixing reduces interruptions and improves control.
Maintaining Consistency During Use
Maintaining ink consistency while working is crucial for smooth application. Ink can dry out, thicken, or separate during use. Follow these tips to keep ink ready:
- Keep the container covered: Prevents evaporation and drying of the ink.
- Stir regularly: Gently mix ink between strokes to maintain uniform texture.
- Use small amounts: Pour ink into a palette or dish to avoid contaminating the main container.
- Control environment: Work in a cool, shaded area to reduce ink drying too fast.
Monitor ink behavior during your session. If the ink thickens, add a drop of water or medium. If it becomes too thin, let it sit briefly to thicken or add pigment.
| Problem | Cause | Solution |
|---|---|---|
| Ink drying on brush | Exposure to air | Cover container; rinse brush often |
| Ink too thick | Evaporation | Add water or medium |
| Ink too thin | Over dilution | Let ink rest or add pigment |
Consistent ink flow supports smooth lines and better detail. Keep your workspace clean and organized to avoid accidental spills or contamination. Regular care of ink improves the final artwork quality.