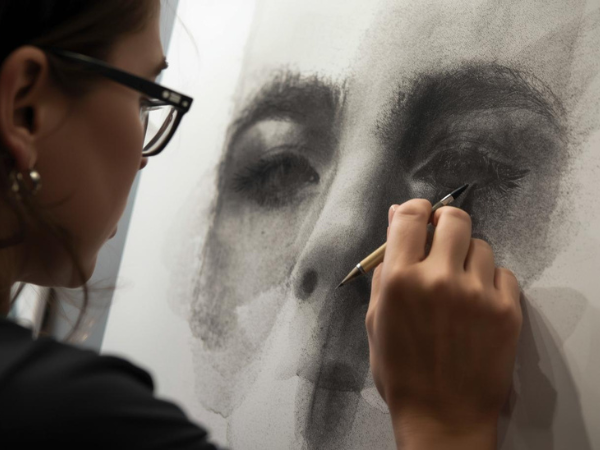
You’ll find easy-to-follow tutorials that help you sculpt, shape, and create with confidence. Imagine turning simple materials into stunning art pieces step by step. Ready to unlock your creative potential and see real progress? Keep reading—your next masterpiece is just a few clicks away.
Basic Sculpting Techniques
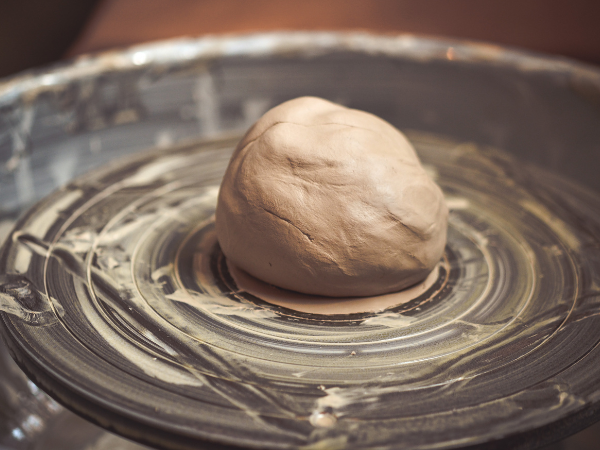
Basic sculpting techniques lay the foundation for shaping clay, wax, or other materials into beautiful forms. Learning these simple methods builds confidence and skills. Each step helps you understand how to work with your chosen material.
Essential Tools And Materials
Starting sculpting requires some basic tools and materials. These help shape your work and make the process easier. You do not need many expensive items at first. Simple, affordable tools work well for beginners. Here is a list of must-have tools and materials:
- Clay or Sculpting Material: Air-dry clay, polymer clay, or natural clay
- Modeling Tools: Wooden or plastic tools with different tips for carving and smoothing
- Wire Armature: Thin wire to build a strong frame for larger sculptures
- Cutting Tools: Small knives or blades to cut and shape details
- Sanding Paper: Fine-grit sandpaper to smooth surfaces after drying
- Water or Clay Softener: Keeps clay moist and easier to work with
- Work Surface: A clean board or mat to protect your table
Using the right tools makes sculpting easier and more fun. Keep your materials organized and clean. This helps you focus on creating your sculpture without distractions.
Simple Shapes To Start With
Start sculpting by practicing with simple shapes. These shapes teach basic hand movements and control. Working with simple forms builds your confidence before moving to complex designs. Focus on these shapes first:
- Sphere: Roll clay into a round ball. This teaches even pressure and smooth surfaces.
- Cube: Shape clay into a square block. Practice making flat sides and sharp edges.
- Cylinder: Roll clay into a tube. This helps with long, smooth forms.
- Cone: Shape clay into a pointed form. Learn to taper shapes evenly.
Practice these shapes by following steps:
- Use your fingers and tools to shape the clay gently.
- Keep the surface smooth by rubbing with wet fingers or tools.
- Check symmetry by rotating the shape often.
- Remove excess clay carefully with cutting tools.
Practicing simple shapes trains your hand muscles and develops an eye for detail. Try combining shapes to make small sculptures like animals or objects. This exercise boosts creativity and skill.
Intermediate Shaping Methods
Intermediate shaping focuses on enhancing the form by adding textures, patterns, and working with various materials. These steps make your work stand out and prepare you for advanced sculpting challenges.
Adding Texture And Detail
Texture adds life to your sculptures. It gives surfaces a tactile feel and visual interest. At the intermediate level, you learn to apply textures carefully to improve realism or artistic effect.
Some common ways to add texture include:
- Using tools like brushes, sponges, or carving knives to create patterns.
- Pressing fabrics or natural objects against the surface.
- Layering thin materials for raised details.
- Scratching or scoring to form fine lines or rough surfaces.
Adding detail requires patience. Small features like wrinkles, scales, or veins make sculptures more believable. Follow these tips for better results:
- Work slowly and build details in layers.
- Use reference images to guide your textures.
- Test texture tools on scrap material first.
- Keep your tools clean for sharp details.
Practice adding textures on small sections before applying them to the whole piece. It improves control and confidence. Textures can be subtle or bold, depending on your style. Experiment to find what works best for your project.
Working With Different Materials
Intermediate sculptors start exploring materials beyond basic clay. Each material has unique properties that affect shaping methods and final looks.
Common materials include:
- Polymer clay: Easy to shape and bake hard in an oven.
- Air-dry clay: Dries without baking but can be fragile.
- Wax: Smooth and good for fine detail but soft.
- Plaster: Hardens quickly, good for molds and casts.
Switching materials expands your skills and creative options. Pay attention to drying times, flexibility, and finishing methods. Each material can inspire new ideas and improve your sculpting craft.
Advanced Creation Tips
This section focuses on Advanced Creation Tips that help artists push boundaries and refine their skills. These tips cover techniques to build intricate designs and combine different materials. They aim to inspire creativity and improve craftsmanship for those ready to advance.
Complex Forms And Structures
Creating complex forms requires careful planning and patience. Start by breaking down your design into smaller parts. This approach makes large or detailed sculptures easier to manage.
- Sketch your idea: Draw different views and focus on shapes and proportions.
- Use armatures: Build a wire frame to support heavy or delicate parts.
- Layer your materials: Add details gradually to avoid mistakes.
Understanding the balance between structure and detail helps keep sculptures stable and appealing. Complex forms often involve curves, angles, and textures that work together.
| Tip | Benefit | Example |
|---|---|---|
| Build armatures | Supports fragile parts | Wire skeleton for a human figure |
| Work in sections | Easier to manage details | Create limbs separately then attach |
| Use reference images | Improves accuracy | Photos of animals or objects |
Patience and practice improve your ability to create complex shapes. Try different tools like carving knives, modeling tools, or digital sculpting software. These help refine edges and add texture.
Mixed Media Approaches
Combining materials brings new life to sculptures. Using mixed media adds color, texture, and unique effects. This approach expands creative options and allows artists to experiment freely.
Common combinations include clay with metal, wood with fabric, or plaster with paint. Each material adds a special quality to the piece.
- Clay and wire: Wire provides structure, clay adds form and detail.
- Wood and fabric: Wood creates a frame; fabric adds softness or color.
- Plaster and paint: Plaster builds solid shapes, paint offers finishing touches.
To work smoothly with mixed media, consider these points:
- Test how materials stick or hold together.
- Use adhesives suitable for your materials.
- Plan the order of assembly carefully.
- Protect delicate parts during handling.
Experimenting with mixed media opens creative doors. It encourages artists to blend textures and shapes. Try new combinations and see what unique results appear.
Creative Project Ideas
Creative projects bring ideas to life with clay, wire, wood, or other materials. They inspire personal expression and improve craftsmanship. This section explores two popular project types: Home Decor Sculpturesand Figurative Art Pieces. Each idea is designed to boost confidence and creativity.
Home Decor Sculptures
Home decor sculptures add charm and personality to living spaces. They can be simple or intricate, matching various tastes and styles. These projects focus on shapes, textures, and colors that complement home interiors. Beginners can start with easy designs, like abstract shapes or small bowls. More advanced artists might try detailed vases or wall hangings.
Ideas for home decor sculptures include:
- Abstract geometric forms that fit modern spaces
- Nature-inspired pieces such as leaves, flowers, or stones
- Functional art like candle holders or planters
- Textured sculptures using patterns and layers
- Colorful accents with paint or glaze finishes
These projects improve hand coordination and design sense. Plus, they make unique gifts or personal treasures.
Figurative Art Pieces
Figurative art pieces focus on representing people, animals, or mythical creatures. They challenge sculptors to capture form, movement, and emotion. This type of project suits artists who enjoy storytelling through their work. Beginners can start with simple shapes or stylized figures. Experts create lifelike sculptures or dynamic poses.
Creative ideas for figurative sculptures include:
- Stylized human busts with smooth lines and simple features
- Animal figures showing basic shapes and posture
- Fantasy characters inspired by myths or stories
- Expressive poses conveying emotions or actions
- Mixed media using wire, clay, and fabric
Figurative sculpture teaches anatomy basics and artistic expression. It offers a satisfying way to communicate feelings and ideas visually.
Troubleshooting And Enhancing Skills
Troubleshooting and enhancing skills help artists overcome these hurdles and improve their craft. Understanding common problems and using feedback can make a big difference. These steps build confidence and refine techniques.
Fixing Common Issues
Common problems in sculpting and shaping can cause frustration. Recognizing these issues early helps save time and effort. Below are frequent problems and how to fix them:
- Cracks or breaks: Often caused by drying too fast or uneven thickness. Fix by keeping the material moist and working in thin layers.
- Uneven surfaces: Use sanding tools or water smoothing techniques to level the surface gently.
- Loss of detail: Avoid overworking the material. Use fine tools for delicate areas and protect finished parts.
- Tool marks: Blend marks with soft brushes or sponges before the material hardens.
Practice patience. Let each layer dry properly before adding more. Check your work often to catch errors early. Troubleshooting is part of the learning process. It leads to stronger skills and better results.
Incorporating Feedback
Feedback is a valuable tool for improving skills. It provides new ideas and different views on your work. Accepting feedback with an open mind helps you grow as an artist. Here are ways to use feedback effectively:
- Listen carefully: Understand what others say about your work.
- Ask questions: Clarify points you do not understand.
- Stay positive: Use feedback as a chance to learn, not as criticism.
- Try suggestions: Test new techniques or ideas shared by others.
- Reflect: Think about how feedback fits your style and goals.
Benefits of incorporating feedback are:
- Spotting weak points you may miss
- Learning new methods and tips
- Improving your confidence
- Building connections with other artists
Feedback sharpens skills. It helps avoid repeated mistakes and encourages creative growth. Use every piece of advice to build better artwork and enjoy your creative journey.