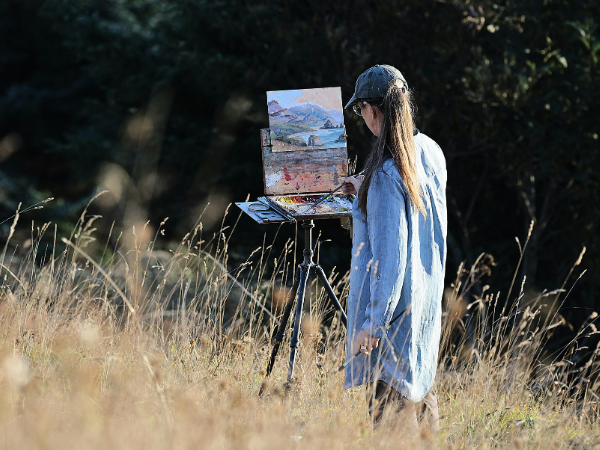
Soft pastels are a wonderful way to add vibrant color and texture to your artwork. You’ll discover simple tips and easy-to-follow steps that will help you feel confident and excited every time you pick up your pastels.
Gathering Your Essential Tools
Gathering your essential tools sets a strong base for learning pastel techniques. Using quality materials helps colors stand out and makes blending smooth. Beginners should focus on a few key items to begin their soft pastel journey confidently.
What You Need To Start
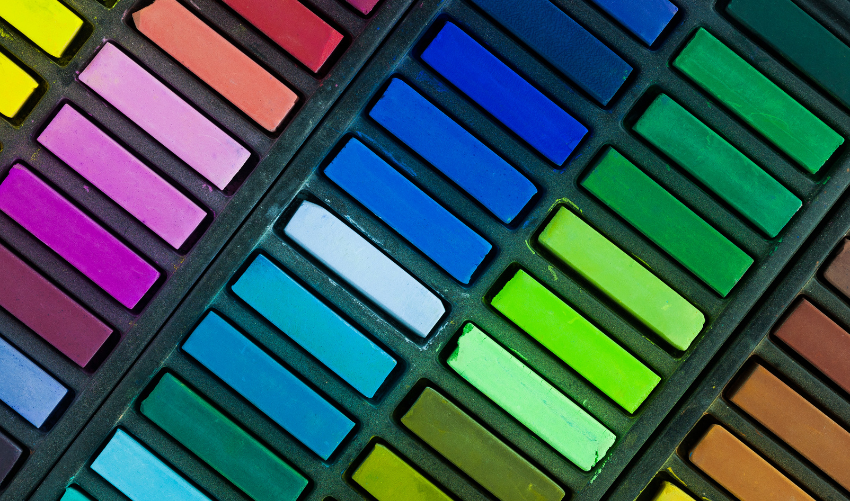
To begin working with soft pastels, gather a few important tools that make your process easier and more enjoyable. A set of soft pastel sticks is the main item you will use for drawing and coloring.
Special pastel paper is important because it holds the pastel pigment well. This paper is often textured or sanded to grip the pastel powder better. Using the right paper improves your final artwork and helps your pastels blend smoothly.
You also need tools to blend and soften colors. A blending tool or blending stumps work well to mix pastel colors directly on the paper. These tools help you create smooth transitions and subtle shading.
Once your work is finished or needs protection, use a workable fixative spray. This spray seals the pastel pigment on the paper and prevents smudging. It allows you to keep adding layers without ruining previous work.
| Tool | Description | Purpose |
|---|---|---|
| A set of soft pastel sticks | Multiple colors in stick form | Main coloring tool for your artwork |
| Special pastel paper | Textured or sanded paper | Holds pastel pigment and enhances blending |
| A blending tool or blending stumps | Tools for smudging and mixing colors | Creates smooth color transitions |
| A workable fixative spray | Spray to seal and protect artwork | Prevents smudging and allows layering |
Having these basic tools helps beginners explore soft pastels with ease. Start simple and add more supplies as you improve your skills.
Preparing Your Working Surface
Preparing your working surface is an important first step in using soft pastels. A good surface helps the pastel stick well and makes your artwork last longer. Setting up your workspace properly means choosing the right paper and organizing your tools.
Choosing The Right Paper
Use paper with a “tooth” or texture. This texture helps hold the pastel pigment better, making your colors look rich and vibrant. Smooth papers do not work well because the pastel slips off easily.
Sanded pastel paper is highly recommended for beginners and advanced artists alike. This type of paper has a rough surface that grips the pastel particles firmly. It allows you to layer many colors without the pastels blending into a muddy look.
Here are some benefits of using sanded pastel paper:
- Holds more pastel layers.
- Allows for smooth blending and shading.
- Durable and less dusty.
- Works well for detailed and bold strokes.
In summary, choose paper with enough texture to hold the pastel pigment. Sanded pastel paper is a great choice for beginners. It helps your colors stay vibrant and your layers stable. Preparing the right surface sets a strong base for your pastel artwork.

Mastering Basic Application
Understanding simple techniques helps build confidence and skill. Each technique adds texture, depth, and color variety to your drawing. Learning these methods improves control over your tools. This section explains how to move from simple to more advanced pastel applications.
From Simple To Advanced
Start with basic pastel strokes to get comfortable with the medium. Soft pastels allow for smooth, rich color application. Try these basic techniques first:
- Layering: Applying one color over another to create depth and new shades.
- Scumbling: Applying a light color over a darker one for texture and highlights.
- Hatching: Creating lines for shading and texture, adding detail.
- Feathering: Light, quick strokes to soften edges and blend colors.
Experiment with these methods on scrap paper to see their effects. Layering helps mix colors without blending fully, making your artwork vibrant. Scumbling adds texture and light, perfect for highlights or rough surfaces. Hatching builds shadows and structure with lines.
| Technique | Description | Use |
|---|---|---|
| Layering | Apply one pastel color over another | Creates depth and blends colors |
| Scumbling | Light color over darker color | Adds texture and highlights |
| Hatching | Lines for shading and texture | Builds shadows and detail |
| Feathering | Light, quick strokes | Softens edges and blends colors |
Once comfortable, combine these techniques. For example, layer a base color, scumble highlights, then use hatching for shadows. Finish by feathering edges to blend.
The Art Of Blending Soft Pastels
Blending soft pastels is a key skill for beginners exploring this vibrant medium. It helps artists create soft edges, smooth gradients, and rich color mixes. The art of blending soft pastels allows you to control the texture and depth of your artwork.
Creating Smooth Transitions
Smooth transitions make your pastel artwork look polished and professional. They help colors flow naturally into each other without harsh lines. To create these effects, you need to blend carefully and choose the right tools for the job.
Finger blending is the most common method. Your fingers warm the pastel, softening the edges and blending colors easily. It works best for large areas but can be less precise. Keep your fingers clean to avoid muddy colors.
Blending stumps are great for small, detailed areas. These tightly packed paper tools help you blend without smudging surrounding parts. They offer more control than finger blending and keep lines sharp.
Tortillons are similar to blending stumps but usually smaller and more pointed. They are perfect for very fine details and precision blending. Use them to smooth tiny transitions or add subtle shading.
Foam and cloth provide broad, soft blending. Foam blocks or soft cloths can gently blur large pastel areas without removing too much pigment. Use these for backgrounds or big color washes.
| Tool | Best Use | Effect |
|---|---|---|
| Finger blending | Large areas | Soft, warm blending |
| Blending stumps | Small details | Controlled, precise blending |
| Tortillons | Fine details | Sharp, delicate transitions |
| Foam and cloth | Broad areas | Soft, gentle blending |
To create smooth transitions, start with light pressure when applying pastels. Layer colors gradually. Use the right blending tool to soften the edges between colors.
Using A Fixative To Protect Your Work
Soft pastels create vibrant and delicate artwork. Their powdery texture makes them prone to smudging. Using a fixative to protect your work is essential. A fixative is a protective coating spray. It helps keep your pastel art safe from damage and dust.
Preserving Your Masterpiece
Fixative prevents smudging and pigment loss, preserving colors and details. It forms a thin protective layer on your pastel surface without changing the colors. For beginners, fixatives help maintain the artwork’s integrity through handling and display.
Use a workable fixative between layers to keep pastels in place while continuing your work. This allows you to add more detail without disturbing previous layers. After finishing the entire piece, apply a final coat for long-term protection.
Follow these tips for the best results:
- Spray light and even coats. Avoid heavy layers that can alter texture.
- Hold the can 12-15 inches away to prevent pooling.
- Apply fixative outdoors or in a well-ventilated area. The spray contains chemicals that need fresh air.
- Allow each coat to dry fully before adding more layers or handling.
Remember, fixative is a tool to protect your art, not to hide mistakes. Test the spray on a scrap paper first. This practice helps avoid surprises on your final piece. Proper use of fixative ensures your soft pastel artwork stays vibrant and intact for years.
Keeping Your Workspace Clean
Keeping your workspace clean is essential when using soft pastels. These art supplies create a lot of fine dust that can spread easily. A tidy workspace helps protect your health and keeps your art looking fresh. Clean surroundings also prevent colors from mixing unintentionally.
Managing Pastel Dust
Soft pastel dust can cause irritation if it spreads too much. Work in a well-ventilated area to reduce dust build-up in the air. Fresh air helps keep your breathing safe and your space free from excess particles. Wearing a light dust mask for protection is a good idea, especially if you spend long hours working with pastels.
Here is a quick checklist to manage pastel dust effectively:
- Open windows or use a fan for airflow.
- Wear a light dust mask during long sessions.
- Brush off dust carefully after finishing.
- Keep pastel sticks and tools clean to avoid excess dust.
Cleaning up pastel dust requires care. Use a soft, dry brush to gently sweep dust away from your artwork and workspace. Avoid blowing dust off your work. Do not blow the dust off your work because it spreads dust into the air and onto other surfaces.