Mastering lighting techniques can transform your art from ordinary to extraordinary. Whether you paint, draw, or create digitally, understanding light will help you add depth, mood, and realism to your work.
Basic Lighting Concepts
Understanding basic lighting concepts is essential for every artist. Light shapes the way we see objects and scenes. It affects colors, shadows, and mood. Knowing how light works helps artists create depth and realism.
Types Of Light Sources
Light sources come in many forms, and each type creates different effects in artwork. Some lights are natural, like the sun, while others are artificial, like lamps. Recognizing these types helps artists decide how to light their scenes.
- Natural Light: Comes from the sun or moon. It changes throughout the day, creating warm or cool tones.
- Artificial Light: Includes bulbs, LEDs, and candles. It offers more control over brightness and color.
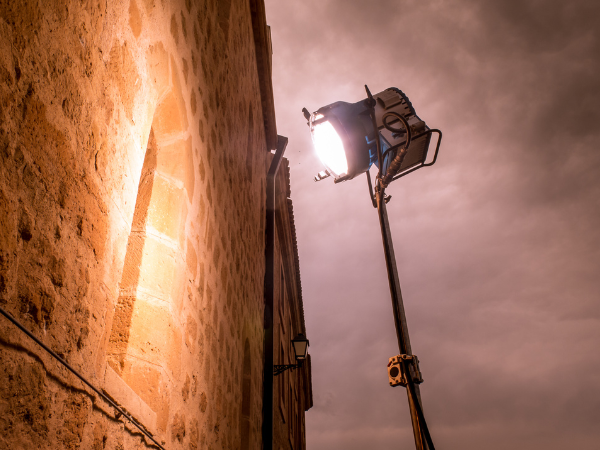
- Direct Light: Shines straight on the subject, creating strong shadows and highlights.
- Diffuse Light: Scatters in many directions, softening shadows and reducing contrast.
These concepts lay the foundation for all lighting techniques. Simple knowledge about light sources, intensity, and direction can greatly improve your art.
Light Intensity And Direction
Light intensity refers to how strong or bright the light is. It changes how objects look in art. Bright light shows more detail but can cause hard shadows. Low light hides details and creates a softer mood.
Direction of light means where the light comes from. It changes the shape of shadows and highlights. Different angles can make objects look flat or three-dimensional.
- Front Lighting: Light hits the subject from the front. It reduces shadows and flattens features.
- Side Lighting: Light comes from one side. It creates strong shadows and highlights texture.
- Back Lighting: Light shines from behind the subject. It creates silhouettes and glowing edges.
- Top Lighting: Light falls from above. It mimics natural sunlight at noon and adds depth.
- Under Lighting: Light comes from below. It produces eerie or dramatic effects.
Mastering light intensity and direction helps artists control mood and realism. Experimenting with these basics improves every artwork.
Natural Vs Artificial Lighting
Lighting is a key part of art. It shapes how viewers see colors, shapes, and textures. Artists use two main types of lighting: natural and artificial. Each type offers different effects and challenges. Natural light changes with time and weather, giving a soft, true look. Artificial light stays steady and can be controlled to highlight details. Understanding how to use both helps artists create mood and depth in their work.

Using Sunlight In Art
Sunlight is a popular choice for many artists. It offers a broad spectrum of colors and changes during the day. This change affects shadows and highlights, adding life to paintings or drawings.
Here are some tips to use sunlight effectively:
- Work near windows: Place your canvas where sunlight can hit it directly.
- Observe shadows: Notice how shadows grow longer or shorter with time.
- Use golden hours: Early morning and late afternoon light is warm and soft.
- Adjust your palette: Colors look different under sunlight than artificial light.
Sunlight offers natural brightness and warmth but changes fast. Artists must plan sessions to catch the best light.
Studio Lighting Setups
Artificial lighting in studios offers control and consistency. Artists can create exact lighting effects any time. This helps with detail work or long sessions. Studio lights come in many forms, such as softboxes, LEDs, and spotlights.
Key points for studio lighting setups:
- Use soft light sources: Softboxes create gentle shadows and smooth highlights.
- Position lights carefully: Place lights at different angles to add depth.
- Mix light temperatures: Combine warm and cool bulbs for natural color balance.
- Control brightness: Dim lights to avoid glare or harsh reflections.
Studio lighting helps artists keep their work consistent. It supports detailed painting, drawing, or photography. Learning to control artificial light is important for professional results.
Shadows And Highlights
Lighting techniques shape the mood and realism of any artwork. Among these, shadows and highlights play a key role. Shadows give objects form and weight. Highlights show where light hits directly. Together, they make images look three-dimensional and alive.
Creating Depth With Shadows
Shadows add depth and volume to flat drawings. Without shadows, objects appear lifeless and two-dimensional. Shadows help the viewer understand the shape and position of objects in space. They also guide the eye through the artwork.
Here are important tips for creating effective shadows:
- Observe light direction: Shadows fall opposite the light source.
- Use soft and hard edges: Soft edges work for diffused light, hard edges for direct light.
- Vary shadow intensity: Strong light creates dark, sharp shadows; weak light makes lighter, softer shadows.
- Layer shadows: Adding layers can build a natural look.
Shadows also create mood. Dark shadows can add mystery or tension. Light shadows can make a scene feel calm and soft. Experimenting with shadows gives artwork emotional depth.
Highlight Placement Tips
Highlights show where light hits a surface most directly. They add brightness and contrast. Correct highlight placement makes objects appear shiny, wet, or smooth. It also helps define the texture.
Consider these tips for placing highlights:
- Match the light source: Place highlights on surfaces facing the light.
- Focus on edges and curves: Rounded objects catch highlights along curves.
- Use small bright spots: For shiny or reflective materials, use small, sharp highlights.
- Blend edges: Soft highlights fit matte surfaces; hard highlights suit glossy ones.
- Limit highlight number: Too many highlights confuse the image.
Highlight placement guides the viewer’s eye. It emphasizes important details and adds interest. Proper highlights balance shadows to create a realistic look. Practice observing real objects under light to improve your highlight skills.
Three-point Lighting
Three-point lighting is a basic but powerful technique every artist should know. It creates depth, dimension, and mood by using three separate light sources. This method helps highlight the subject clearly and adds natural shadows. Artists can control how light falls on their subject to make scenes more interesting and realistic.
Key Light Techniques
The key light is the main source of light in three-point lighting. It shines directly on the subject and sets the overall feel of the scene. Usually, it is placed at a 45-degree angle from the front and slightly above the subject’s eye level.
Here are some important points about key light:
- Intensity: The key light is the brightest light in the setup.
- Position: Placed to one side to create contrast and shadows.
- Hard or Soft: Use hard light for sharp shadows or soft light for gentle shading.
- Color Temperature: Adjust warmth or coolness to match mood.
Positioning and adjusting the key light helps define the subject’s features and sets the scene’s mood.
Fill Light Usage
The fill light softens the shadows created by the key light. It prevents parts of the subject from becoming too dark. Usually, it is placed on the opposite side of the key light and at a lower intensity. This light balances the lighting and reveals details in the shadow areas.
Important tips about fill light:
- Lower Intensity: Keep the fill light weaker than the key light.
- Position: Place it near the camera or opposite the key light.
- Soft Light: Use diffusers or softboxes for gentle lighting.
- Shadow Control: Adjust brightness to control shadow depth.
Good fill light use creates a natural look. It also helps keep details visible without losing the depth created by shadows. Adjust the fill light carefully to keep a pleasing balance between light and dark.
Chiaroscuro And Contrast
Chiaroscuro is a famous lighting technique used by artists to create strong contrasts between light and dark areas. This method helps to show volume, depth, and drama in paintings or drawings. The word comes from Italian, meaning “light-dark.”
Dramatic Lighting Styles
Dramatic lighting uses sharp contrasts to create tension and interest in art. It often highlights important parts of a subject while hiding others in shadow. This style can make scenes look mysterious, powerful, or intense.
Key features of dramatic lighting include:
- Strong contrasts: Bright lights next to deep shadows.
- Focused light: Light shines on a specific area, like a face or hand.
- Shadow play: Shadows create shapes that add to the story.
Artists use different light sources to achieve this effect:
| Light Source | Effect | Example Use |
|---|---|---|
| Single Spotlight | Creates sharp shadows and highlights | Portraits with strong emotion |
| Side Lighting | Emphasizes textures and forms | Still life or figure drawing |
| Backlighting | Creates a glowing outline | Silhouettes or dramatic scenes |
Using dramatic lighting brings a powerful mood to your artwork. It guides the viewer’s eye and adds depth to the composition. Experimenting with different angles and light intensities helps find the best look for your subject.
Balancing Light And Dark
Balancing light and dark areas is crucial for effective chiaroscuro. Too much light can wash out details, while too much darkness can hide important parts. The right balance creates harmony and keeps the viewer interested.
Artists use several methods to balance light and dark:
- Gradation: Smooth transition from light to shadow.
- Highlight placement: Bright spots guide attention.
- Shadow depth: Shadows add volume and shape.
Below is a simple guide to balance light and dark in art:
| Aspect | Light | Dark | Purpose |
|---|---|---|---|
| Volume | Illuminates curved surfaces | Defines edges and form | Create 3D effect |
| Focus | Highlights key areas | De-emphasizes less important parts | Direct viewer’s eye |
| Mood | Bright and open feeling | Mysterious or dramatic tone | Set atmosphere |
Achieving balance requires practice. Artists often sketch light and shadow patterns before adding details. Using simple shapes helps plan the composition. Remember, contrast should serve the story the artwork tells.
Lighting For Different Mediums
Lighting plays a vital role in all artistic fields. Different mediums respond uniquely to light. Knowing how to use light can improve the quality and mood of your art. Artists must understand lighting techniques suitable for each medium.
Painting And Drawing
In painting and drawing, lighting affects the perception of shapes, colors, and textures. Artists often use light to create contrast and depth. Proper lighting brings life to flat surfaces and guides the viewer’s eye.
Key points to consider:
- Light source direction: Decide where the light hits your subject. Side lighting creates shadows and volume.
- Intensity: Strong light produces sharp shadows. Soft light gives gentle transitions.
- Color temperature: Warm light adds a cozy feel. Cool light feels calm or distant.
- Reflected light: Light bouncing from surfaces affects shadow areas and adds realism.
Artists use these techniques to simulate natural or artificial lighting. For example, in portrait drawing, side lighting enhances facial features. In landscapes, warm sunset light adds drama.
| Lighting Type | Effect | Best Use |
|---|---|---|
| Direct Light | Sharp shadows, high contrast | Strong shapes, dramatic scenes |
| Diffuse Light | Soft shadows, smooth gradation | Portraits, gentle moods |
| Back Light | Silhouettes, glowing edges | Highlighting outlines, mystery |
Experimenting with different lighting setups helps artists find their style. Observing real-life light behavior sharpens skills. Simple tools like a desk lamp or natural window light can serve as excellent references.
Photography And Digital Art
Lighting is crucial in photography and digital art to control mood, focus, and clarity. Photographers manipulate light to highlight subjects or create effects. Digital artists simulate lighting to give their work depth and realism.
Important lighting concepts:
- Key Light: Main source that shapes the subject.
- Fill Light: Softens shadows from the key light.
- Back Light: Separates the subject from the background.
- Ambient Light: General light in the scene.
In photography, lighting setups vary by style:
- Portraits often use soft key and fill lights for flattering effects.
- Product shots use even, bright light to show details.
- Low-key lighting creates mood with strong shadows.
Digital artists use software tools to mimic these lights. Layering light effects can add realism or stylize the image.
| Lighting Setup | Purpose | Common Use |
|---|---|---|
| Three-Point Lighting | Balanced illumination and depth | Portraits, character renders |
| Natural Lighting | Soft, realistic feel | Outdoor scenes, lifestyle photos |
| High-Key Lighting | Bright, minimal shadows | Fashion, commercial photography |
Practicing with different light types improves control over the final image. In digital art, adjusting shadows, highlights, and reflections enhances visual impact.